User input
What we'll learn
- The three pieces of the Elm architecture
- How to update UI when a user clicks a button
- How to add more features to an existing app
Making HTML interactive
All the pages we saw in the guide so far were rendering HTML. Every time you loaded a page, it showed the same HTML. For more interesting applications, you'll need to update HTML as a user interacts with your app.
Let's start with a brand new project: Making a counter app!
elm-land init user-inputcd user-inputelm-land serverWe can create a new page that keeps track of our UI's state using the elm-land add page:sandbox command. This time around, we'll use page:sandbox instead of the page:view from previous guides:
elm-land add page:sandbox /countermodule Pages.Counter exposing (Model, Msg, page)
import Html exposing (Html)
import Page exposing (Page)
import View exposing (View)
-- PAGE
page : Page Model Msg
page =
Page.sandbox
{ init = init
, update = update
, view = view
}
-- INIT
type alias Model =
{}
init : Model
init =
{}
-- UPDATE
type Msg
= NoOp
update : Msg -> Model -> Model
update msg model =
case msg of
NoOp ->
model
-- VIEW
view : Model -> View Msg
view model =
{ title = "Counter"
, body = [ Html.text "/counter" ]
}The page file generated for us doesn't do anything cool yet. It just shows "/counter" (which is pretty boring).
Learning the Elm architecture
All Elm Land projects use the Elm Architecture, which is an easy way to track the state of our web application.
Let's walk through updating each piece of our new page step-by-step. By the end, we'll have a fully working "Counter" app!
Model
The Model describes the shape of the state of our application. We'll add a counter field to track an Int value. In Elm, "Int" is short for "integer" which is nerd-speak for "whole number":
type alias Model =
    { counter : Int
}init
The init function defines the initial value of your Model when the page loads. The Model we defined above only describes the shape of our model, but not it's current value.
In our app, we'll want the counter to start at 0 when the page loads. We'll define that initial value in our init function:
init : Model
init =
    { counter = 0
}Msg
The Msg type is a custom type that defines how a user can change our page's Model. Elm lets us use "custom types" to define all the possible ways our UI can change our code.
Looking at the Msg type is an easy way to learn all the ways a page's state can change. Here are the two "variants" we'll need for this page's Msg type:
type Msg
    = UserClickedIncrement
| UserClickedDecrementupdate
The update function returns a new, updated Model based on which Msg was sent from our view function. It also has access to the current state of our Model, so it can do any calculations it needs.
Here we'll use Elm's "record update syntax" to change the counter field of our model based on which Msg we get:
update : Msg -> Model -> Model
update msg model =
    case msg of
        UserClickedIncrement ->
            { model | counter = model.counter + 1 }

        UserClickedDecrement ->
{ model | counter = model.counter - 1 }"Where does update get called?"
Elm automatically calls update for us whenever the view function sends a Msg. Unlike in a JS framework, we don't call the update function manually ourselves.
view
The view function renders the current version of our Model into HTML our users can see.
For our example, our view function will need two <button> HTML elements that send Msg values. Between each button, we'll render a <div> that shows the current value of our counter:
import Html.Events

-- ( imports always go at the top, under the "module" declaration )


view : Model -> View Msg
view model =
    { title = "Counter"
    , body =
        [ Html.button
            [ Html.Events.onClick UserClickedIncrement ]
            [ Html.text "+" ]
        , Html.div []
            [ Html.text (String.fromInt model.counter) ]
        , Html.button
            [ Html.Events.onClick UserClickedDecrement ]
            [ Html.text "-" ]
        ]
}Putting it all together
If we add each of these snippets to our src/Pages/Counter.elm file, we'll have a working counter app that can increment and decrement a number!
Our updated src/Pages/Counter.elm
module Pages.Counter exposing (Model, Msg, page)

import Html exposing (Html)
import Html.Events
import Page exposing (Page)
import View exposing (View)


-- PAGE


page : Page Model Msg
page =
    Page.sandbox
        { init = init
        , update = update
        , view = view
        }


-- INIT


type alias Model =
    { counter : Int
    }


init : Model
init =
    { counter = 0
    }


-- UPDATE


type Msg
    = UserClickedIncrement
    | UserClickedDecrement


update : Msg -> Model -> Model
update msg model =
    case msg of
        UserClickedIncrement ->
            { model | counter = model.counter + 1 }

        UserClickedDecrement ->
            { model | counter = model.counter - 1 }


-- VIEW


view : Model -> View Msg
view model =
    { title = "Counter"
    , body =
        [ Html.button
            [ Html.Events.onClick UserClickedIncrement ]
            [ Html.text "+" ]
        , Html.div []
            [ Html.text (String.fromInt model.counter) ]
        , Html.button
            [ Html.Events.onClick UserClickedDecrement ]
            [ Html.text "-" ]
        ]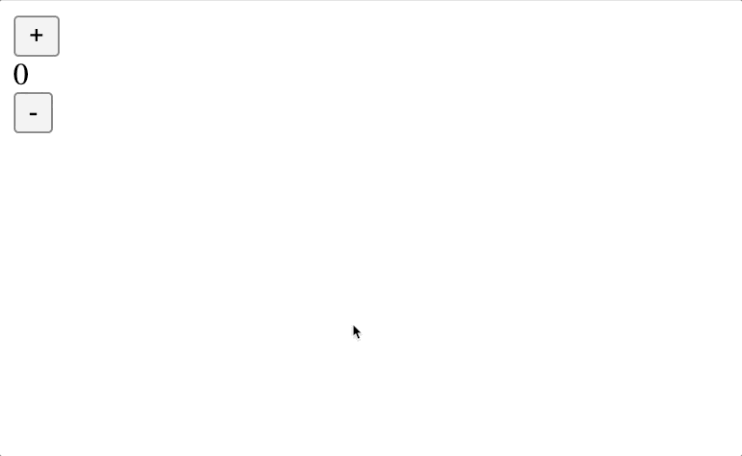
}When we open our web browser at http://localhost:1234/counter, we'll see an interactive counter application that looks like this:
See the full example in the examples/03-user-input folder on GitHub.
Oops, you're an Elm developer! 🎉
Now that you've seen the official counter example, you're officially an Elm developer. We're so glad to have you join the party!
You can use the elm-land add page:sandbox command anytime you want your page to track local UI state.
For things like talking to a REST API, you'll want to use something a bit more advanced. Let's cover that in the next section!